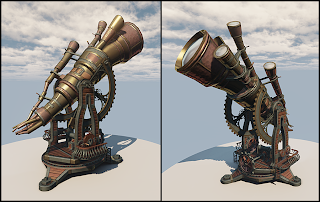
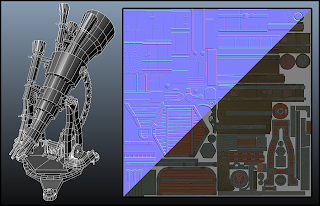
The Apex Observatory environment turned out to be too ambitious, and I made some bad decisions in the beginning which greatly slowed me down. So in order to complete something by the time of graduation I decided to scale things down and focus on a hero prop for the environment while I sort out the rest.
Unlike my usual workflow of modeling a highpoly and baking down maps I decided to try something different. All the detailing on the telescope was done 100% in Photoshop using the plugin nDo2. The plugin is also nice enough to generate AO and cavity, which I used as a nice base for the texture. Quixel's new plugin dDo was released just as I was done texturing my telescope, which is a shame because it would have made the process a lot faster.
In retrospect I should have been better at reusing details and features on it, particularly on the cylindrical parts as they are all rather similar. It would have saved me a ton of time. Also I should have made the mechanism at the base more nonsensical and interesting looking since the whole design is very whimsical.
Now I am doing a quick and very simple environment for it to live in. I'm going with the same basic idea as the Apex Observatory where a rickety and precarious observatory has been built on a very high and narrow peak above the clouds. Except now it's scaled down to a single eccentric astronomer living as a hermit on a tiny patch of land. Here is an early iteration:
Monday, December 3, 2012
Friday, November 30, 2012
dDo is pretty neat.
So dDo by Quixel is in open beta now and I gave it a spin. Just a simple test on a super generic nonsense sci fi wall, but it's a very handy tool. Won't be able to replace doing texturing b hand, but it automates a lot of the drudgery of painting in scratches along edges and blending dirt into cavities. Me likey.
Labels:
3D,
dDo,
Environment,
Hard Surface,
Maya,
nDo,
Texturing
Monday, November 5, 2012
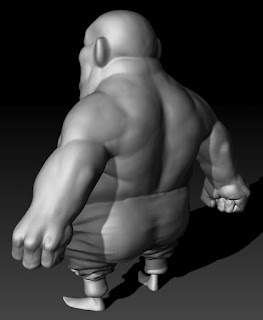
Fatty The Pirate
I think this guy has shown up in a previous post or two, but I decided to sit down one day and texture him. I tried out a new approach to handpainted textures where I make a base diffuse lighting pass out of the green channels (up vector) of a Bent Normal map and a PrtP map, and make a cavity map out of a normal map to bring out some details. Then I just painted skintones and such and blended them with the light pass. It turned out pretty nice, I'll definitely keep using this technique.
Labels:
3D,
Handpainted Textures,
Lowpoly,
Organic Modeling,
zBrush
Monday, October 8, 2012
Trying out a neat technique.
I saw a really clever technique in a video by Ryan Kingslien and had to try it out. Instead of sculpting on top of a flat featureless basemesh I made a quick wire armature with zSpheres and then used the InsertSphere brush to add "lumps of clay" that I then stretched and deformed into the different muscles and big forms. Essentially emulating how one would work with clay in real life. It's a really obvious way to work when I think about it, and the tools have been around since zBrush 3 so I have no idea why I never throught of it before.
Here is the video I mentioned by the way:
Labels:
3D,
Anatomy,
Clay,
Daily Sketches,
Organic Modeling,
zBrush
Wednesday, August 8, 2012
Just a window.
Updates have been slow. Moving out and getting ready for the Massive Black Workshop here in SF.
Today I made a Window. Huzzah. Trying to compile a set of MultiMesh brushes in zBrush through this project, that should save me some time in the future.
Today I made a Window. Huzzah. Trying to compile a set of MultiMesh brushes in zBrush through this project, that should save me some time in the future.
Labels:
3D,
Apex Observatory,
Environment,
Hard Surface,
Organic Modeling,
zBrush
Wednesday, August 1, 2012
Sunday, July 22, 2012
UDK Fake Thickness Material
Today I made a material that fakes thickness on surfaces that use transparency masking.
The concept is basically to offset the texture with a Bump Offset node (also known as Parallax), then darkening it with a multiply node, and then adding it underneath the original texture with a Lerp node. It doesn't handle corners that well, so I'm wondering if multiple stacks of Lerp might help with the illusion but I'm worried about the drawcalls. Also, I'm not sure if this is more efficient than just stacking two planes, I'll have to do some testing.
Labels:
3D,
Environment,
Rendering,
Shaders and Materials,
Technical Art,
UDK
Friday, July 20, 2012
More technical art!
I saw a pretty good explanation of a Silent Hill style transition material so I was inspired to try that out myself. The article in question is here: http://dp3dblog.tumblr.com/post/26742825968/thoughts-on-texture-transition-fx
But I did a change to it where I did an Add operation of the rock texture on top of the transition mask to make the glow effect match the rock texture better.
The material is connected to a Matinee that controls the transition parameter, and the Matinee is triggered by a key press through Kismet. T to make the transition, and G to reverse it.
Labels:
3D,
Rendering,
Shaders and Materials,
Technical Art,
UDK
Thursday, July 19, 2012
The Apex Observatory: Final block-in and a texturing test.
Opted for a mashup of A and C, and I decided to move the platform out further so players arriving by the elevator can get a better view of the structure. The building itself isn't very modular, but I intend to make good use of tiling textures and material effects for things like snow.
I also did a quick texture pass on the walkway to probe for any oddities surrounding how UDK handles textures and UV's. I discovered that shadows won't render if the UV's go outside 0-1 space. And I ran into a problem with baking lightmaps. It seems like meshes with transparency won't cast shadows when using Lightmass, although realtime shadows do. Apparently this is a bug with the May build, but a workaround is supposed to be to change the material Blend Mode to BLEND_Translucent and set Cast Shadow As Masked to True but that isn't working either. Very odd...
Labels:
3D,
Apex Observatory,
Environment,
Hard Surface,
UDK
Thursday, July 12, 2012
The Apex Observatory: Block-in stage
All right, graduating in winter, time to get some portfolio pieces out of the door.
The Apex Observatory is built on a thin needle of a mountain that pokes up above the clouds so the astronomers always have a clear view of the sky. Unfortunately space is rather scarce and with star gazers flocking in from all corners of the world comes the demand for expanded facilities.
A bit of a whimsical environment. The idea is essentially a cluster of towers and buildings huddled together on a tiny peak. It will sort of float in an expansive sea of clouds with a few smaller peaks poking out like islands. Above will be a beautiful star filled sky with all its celestial bodies in clear view.
So far I've just done some quick block-ins in Maya, trying to get a feel for the general shape and composition of the structure. I like the lopsided and angular towers in A, but I find the general layout rather boring. I'm liking the general construction of the structure and the shape of the towers in B, but I feel the layout and negative space in C is a lot more interesting.
Labels:
3D,
Apex Observatory,
Environment,
Hard Surface,
Maya,
UDK
Friday, June 1, 2012
Some technical art for a change.
A friend of mine asked about custom materials in Unity and I ended up experimenting with making a vertex blending material. I used the Strumpy Shader Editor because I'm not a programmer, but the concept is to combine the vertex color and a depth map to mask the blending of two different sets of textures.
It's essentially this material for UDK, except done in Unity:
Labels:
3D,
Environment,
Shaders and Materials,
Technical Art,
Unity3D
Tuesday, May 29, 2012
Big ol' backlog of stuff.
All right, been too busy to post lately. Here is a bunch of stuff from the end of the semester:
The ecorche is done, which is the project that has absorbed most of my time this last month. Every muscle and bone has been modeled out, although the proportions are a bit off here and there.
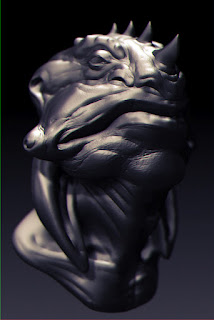
Creepy Spider dude thing. 3 hour sketch experimenting with alphas.
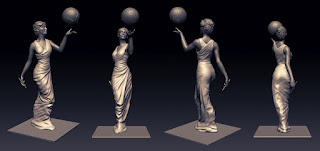
Urania the greek Muse of Astonomy and Philosophy. A midterm project for my Myth and Symbols class where I had the option to make a piece of art rather than write an essay. Rendered with vRay.
Base for the hair and cloth was done with zSketch.
Fishman, another quick sketch.
Experimenting with the Unity engine's Terrain system.
Labels:
3D,
Anatomy,
Daily Sketches,
Environment,
Organic Modeling,
Rendering,
Unity3D,
vRay,
zBrush
3DS Max Traffic Light
I am doing a weekly modeling club with some schoolmates where we give each other a weekly challenge. This week's challenge was a traffic light done entirely in 3DS Max. This is my first time using 3DS Max so it was slow as hell and parts are a bit funny looking.
Monday, April 30, 2012
Little toy people
Saw a guy at zBrushcentral who used zBrush to design vinyl toys, so I decided to give that a try.
Rendered this guy in VRay and gave it funky colors in Photoshop.
This is just the zBrush viewport, I might render him later once I find a good way to transfer the polypaint colors.
Labels:
3D,
Creature,
Daily Sketches,
Maya,
Organic Modeling,
Rendering,
zBrush
Thursday, April 26, 2012
Experimenting with zSketch: A Sphere thingy.
So I figured out a way you can use zSketch on a polygon mesh rather than just a zSphere. It's ridiculously simple, you just append the zSphere to the tool you want to draw on and enter zSketch mode. So I had fun with a sphere and some radial symmetry. :)
As soon as I get on a stronger computer I'll bake this out as a Unified Skin so I can bring it into Maya and give it a proper render. I need a really high resolution setting to catch all the detail and this computer just chokes on it. :<
As soon as I get on a stronger computer I'll bake this out as a Unified Skin so I can bring it into Maya and give it a proper render. I need a really high resolution setting to catch all the detail and this computer just chokes on it. :<
Sunday, April 22, 2012
Big fat update.
I keep forgetting to update this blog, so here is a big pile of what I've been doing lately.
Skeleton is almost done. Just need to finish the feet and skull, and fix some proportions.
Elaborated more on the scar of this guy.
Did a bust of Disney's Jafar.
And experimented with some zBrush alpha features and texturing techniques.
Which I recorded a video of, gonna start doing this for my sketches from now on.
Skeleton is almost done. Just need to finish the feet and skull, and fix some proportions.
Elaborated more on the scar of this guy.
Experimented with some Mental Ray features. Not really noticable in this picture. Details here: http://forums.cgsociety.org/showthread.php?f=87&t=970700&page=1&pp=15
Did a bust of Disney's Jafar.
A shitty arm study.
And experimented with some zBrush alpha features and texturing techniques.
Which I recorded a video of, gonna start doing this for my sketches from now on.
Labels:
3D,
Anatomy,
Daily Sketches,
Hands,
Maya,
Organic Modeling,
Rendering,
zBrush
Friday, April 6, 2012
Thursday, April 5, 2012
Thursday, March 29, 2012
Sunday, March 18, 2012
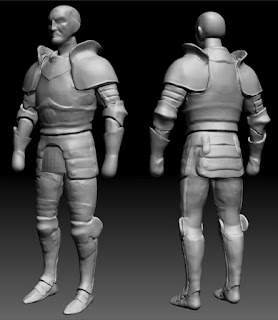
Dude in armor part 1
wanna try out some hard surface stuff in zBrush. Here is an early concept sculpt I'll be working off.
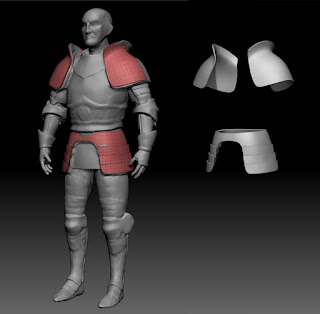
EDIT:
I don't feel this warrants a new post so I'll just edit it in here.
This is what I'm getting out of this process. Still pretty minor but it has a lot of potential.
Labels:
3D,
Daily Sketches,
Hard Surface,
Organic Modeling,
zBrush
Subscribe to:
Posts (Atom)
